When I was thinking about what dessert I wanted to post first on my blog, I thought about cheesecake. Next to ribs, cheesecake is one of those Instant Pot favorites that every IP owner tries, and then makes again and again because it comes out amazing. However, I wanted to make sure I represented Cuban flavors, and as any good Cuban knows from the minute they are born, the one flavor that goes hand in hand with cream cheese is guava (or as it’s called in Spanish, Guayaba). Whether it’s crackers with guava paste and cream cheese or pastelitos de guayaba y queso (guava and cream cheese Cuban pastries), these two flavors are the Cuban equivalence to peanut butter and jelly or, even better, peanut butter and chocolate!
I wanted to create a recipe that was easy for any novice Instant Pot user and also gave a foolproof creamy texture that wasn’t too finicky about mixing speed (I mix the whole thing in a food processor), a crisp crust that didn’t need to be pre-baked and yet didn’t get soggy from the filling, and a guava topping that was the perfect balance of creamy, but not runny. After some serious research, I mixed a few recipes and added a few ideas of my own to create the perfect guava cheesecake.
Instant Pot Guava Topped Cheesecake
Recipe by Lana Horruitiner Perez
Crust:
12 Goya Maria Cookies (You can also use Animal Crackers or Graham Crackers, though Graham Crackers tend to get a little soggy)
1 Tsp Sugar
2 Tbls Melted Butter
4 oz White Chocolate, chopped small
Filling:
16 oz Cream Cheese, room Temperature
1/2 cup Sugar
1/4 cup Sour Cream, room temperature
1 tsp Vanilla
2 Whole Eggs, room temperature
1 Egg Yolk, room temperature
1/8 cup Heavy Cream, room temperature
1 tsp All-Purpose Flour
Topping:
11 oz Guava Paste
1/2 cup Water
1 Tbl Meyer Lemon Juice (I had meyer lemons which are sweeter and less tart then regular lemons. However, use whatever you have one had whether it’s bottled lemon juice or regular lemons. Just add a little less so the topping is not tart.)
*Tip: Below are the cookies and guava paste I use.

-Grease (I use Pam) a 7 inch Cheesecake Pan. I used the Webake 7-inch Springform leakproof Cheesecake Pan. However, use what you have as long as you can remove the bottom since you cannot turn these cakes out like you would a regular cake. 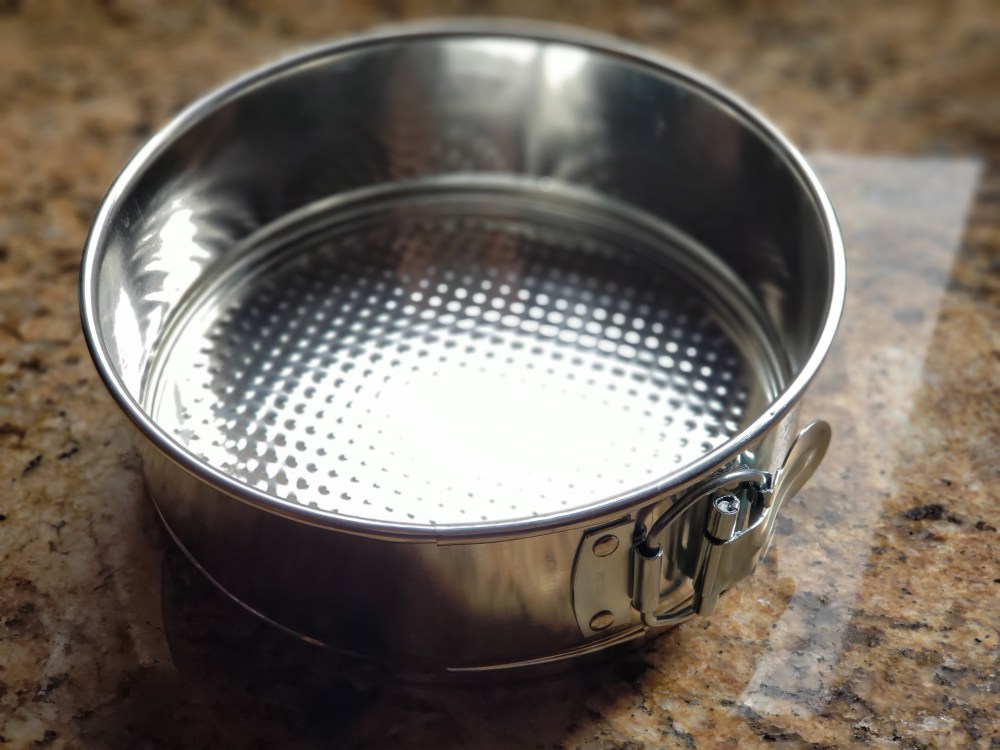
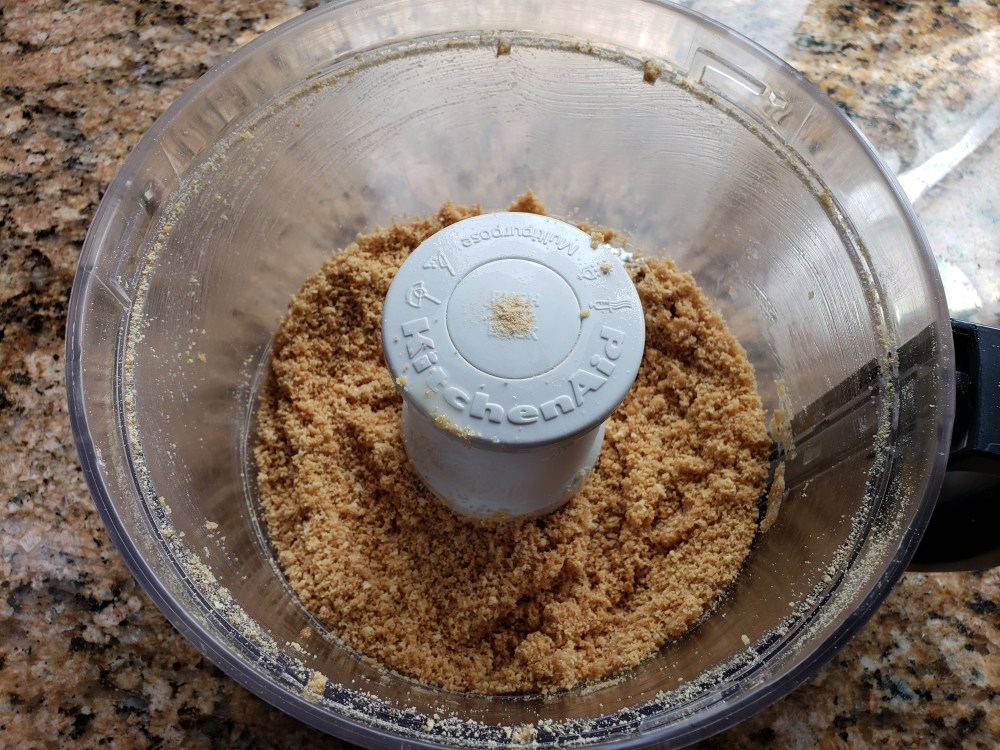
-In a food processor, pulse the 12 Maria Cookies and 1 tsp Sugar to a coarse sand-like texture. Drizzle in the 1 Tbl melted butter and pulse until combined.
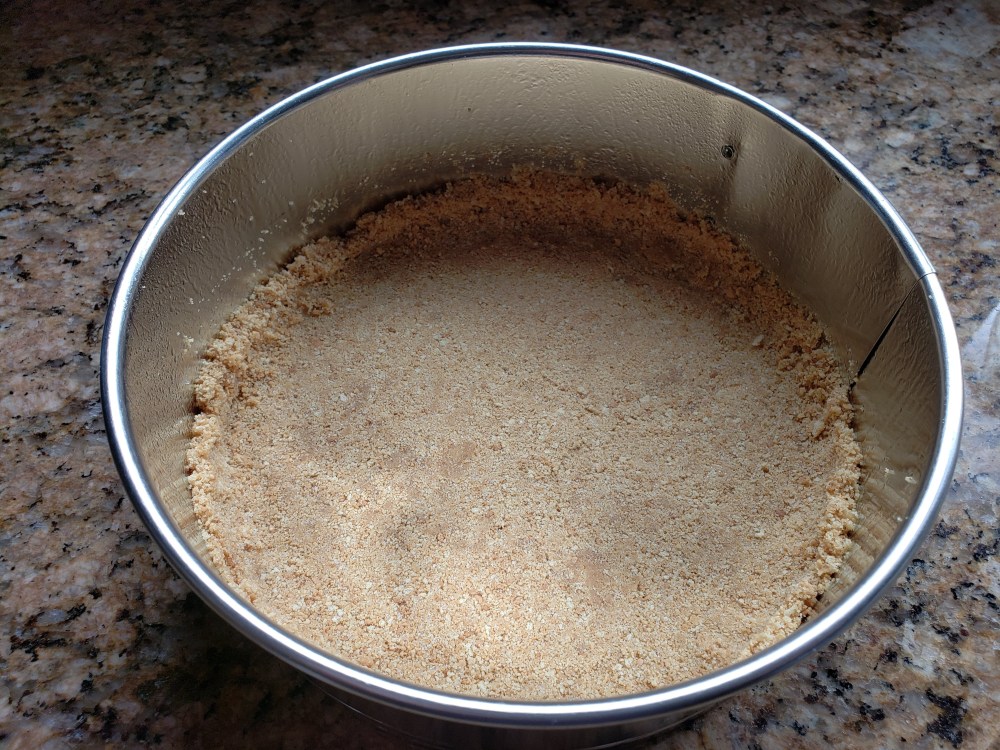
-Pour cookie mixture into the Springform pan and press until you get an even layer on the bottom of the pan and up the sides about a half inch. I like to use a flat bottom measuring cup to press the crust. Work slowly and don’t worry if it’s not perfect. Place in the freezer for at least 20 mins.
-While the crust is in the freezer, start combining the filling. In the clean food processor, add the 16 oz Cream Cheese, 1/2 cup Sugar, 1/4 cup Sour Cream, 1/8 cup Heavy Cream, 1 tsp Flour, and 1 tsp Vanilla. (Important Tip** The key to a smooth and creamy cheesecake is for all the ingredients to be at room temperature. However, if you are forgetful like I am, it’s hard to remember to put out the ingredients an hour ahead of time. However, there are ways to get around this. For the Cream Cheese and Sour Cream, you can microwave them on the defrost setting for a few seconds. Just check the temperature after 10 seconds. You don’t want it to be hot or even warm. Just not cold. To bring eggs to room temperature, just place them in a large glass of warm water for a minute.) 
-Blend on low until smooth. Then add each Egg and the Egg Yolk, one at a time, pulsing twice each time an egg is added. Pour the mixture into a large bowl. If there are any yellow streaks, just fold them in by hand. Let the mixture sit while you work on the next step. 
-Chop the 4 oz of White Chocolate into small chunks. After 20 mins, take out the crust from the freezer and sprinkle the White Chocolate over the crust and spread out as evenly as you can. I am not a big fan of white chocolate, however, I found that you don’t really taste it all that much. But it creates a barrier between the filling and the crust and keeps it from getting soggy. I came upon this trick when I was figuring out a copy cat recipe for my daughter’s favorite cheesecake, the White Chocolate Raspberry Truffle Cheesecake from Cheesecake Factory, that I could make in the Instant Pot (I will add that recipe to the blog as well. It’s delicious!) If you are really opposed to the White Chocolate, you can omit it.


-Pour the filling into the pan over the White Chocolate. Tap hard on the counter about 5 times to get any lingering air bubbles out. Cover loosely with aluminum foil.
-In your Instant Pot, add 1 1/2 cups Water and then place the trivet in the Instant Pot. You do not want the cheesecake to sit in the water! Make a foil sling by folding a 12 inch piece of foil long ways into a strip that is about 1 inch wide. You will use this to lower your cheesecake into the Instant Pot. I keep my sling in a drawer so I don’t have to make one every time. Fold down the ends just so they don’t get caught when you close the lid. 
-Place and Lock the lid on the Instant Pot and turn the vent to Seal. Press the “Manual” button and increase the time to 35 mins High Pressure. Once it is done cooking, allow the pressure to Naturally Release for 18 mins. If there is any pressure left after 18 mins you can Quick Release it the rest of the way. Try and lift the lid straight up so the condensation water doesn’t fall on the cake.
-Remove the cheesecake and place on a cooling rack. Remove the foil and if there is any water on the top of the cake, just use a paper towel to lightly draw up the water from the top and around the edges. Allow to cool at room temperature for 60 mins. Then cover with cling wrap and place in the fridge for 2 hours. 
-After 2 hours, start making the guava topping. Cut the paste into large chunks and place in a microwave safe bowl or large measuring cup. Add 1/2 cup water. Place in the microwave for 1 minute and 20 seconds. In 20 second intervals, stir the mixture. Stop microwaving it once it has melted. Stir in the Lemon juice.


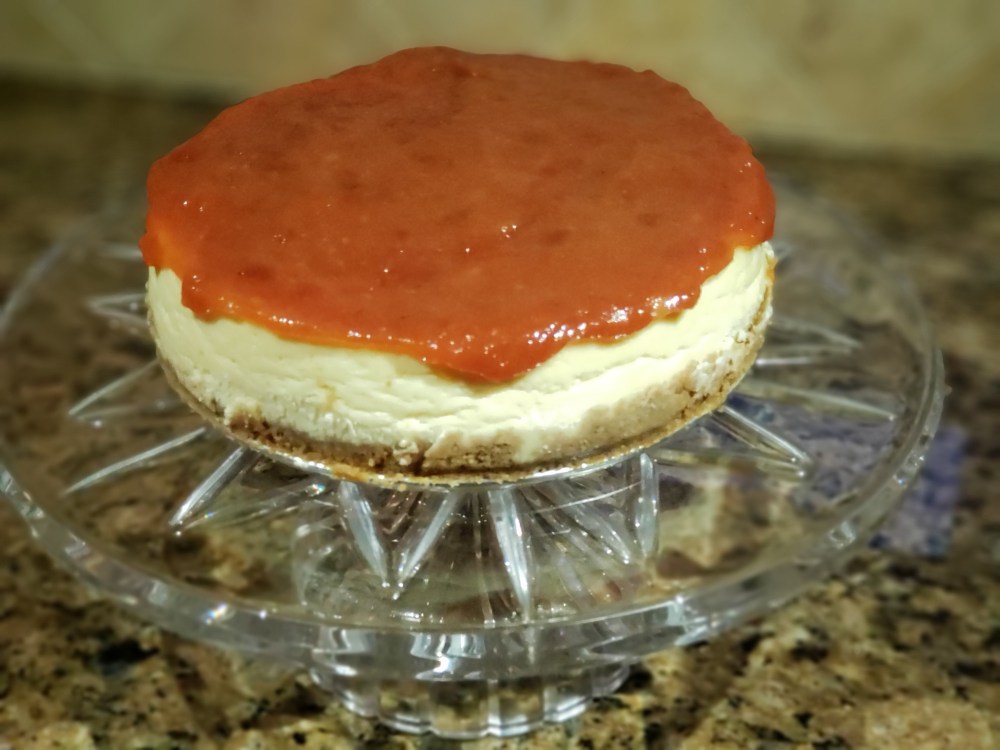
-Pour the topping over the cheesecake. Spray an offset spatula with Pam and smooth the topping into a nice even layer over the cheesecake. Cover the pan with cling wrap and place int he fridge for at least another 4 hours (overnight is best).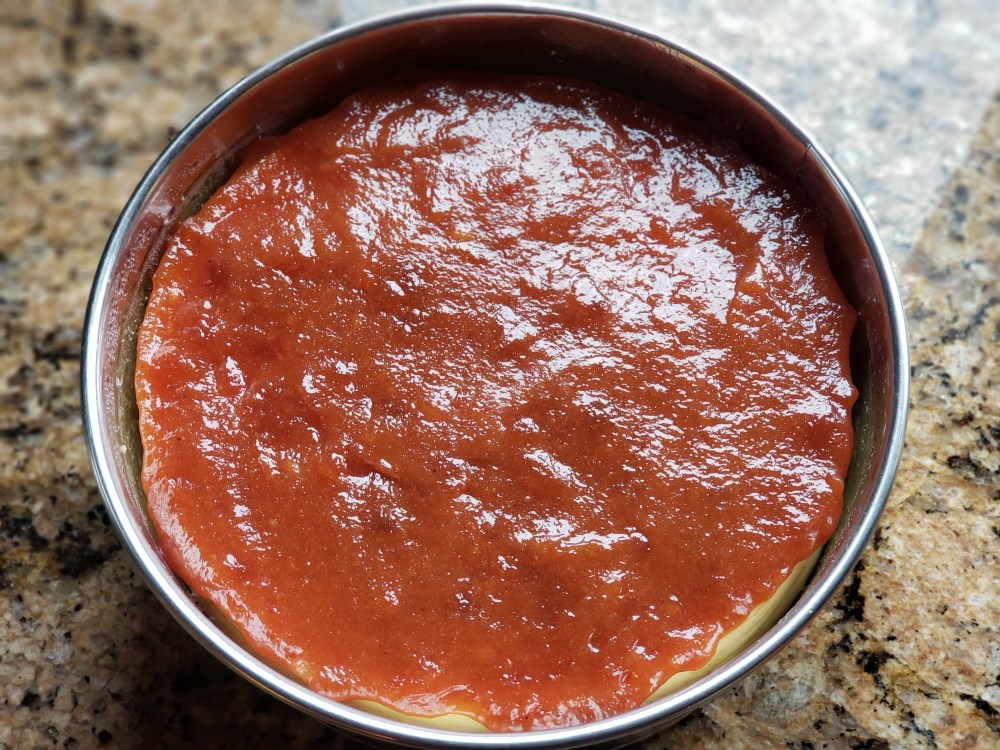
-To remove the cheesecake from the pan, run a knife around the edge of the pan. Then place the pan on a tall, wide glass. Push the bottom up and the sides down. 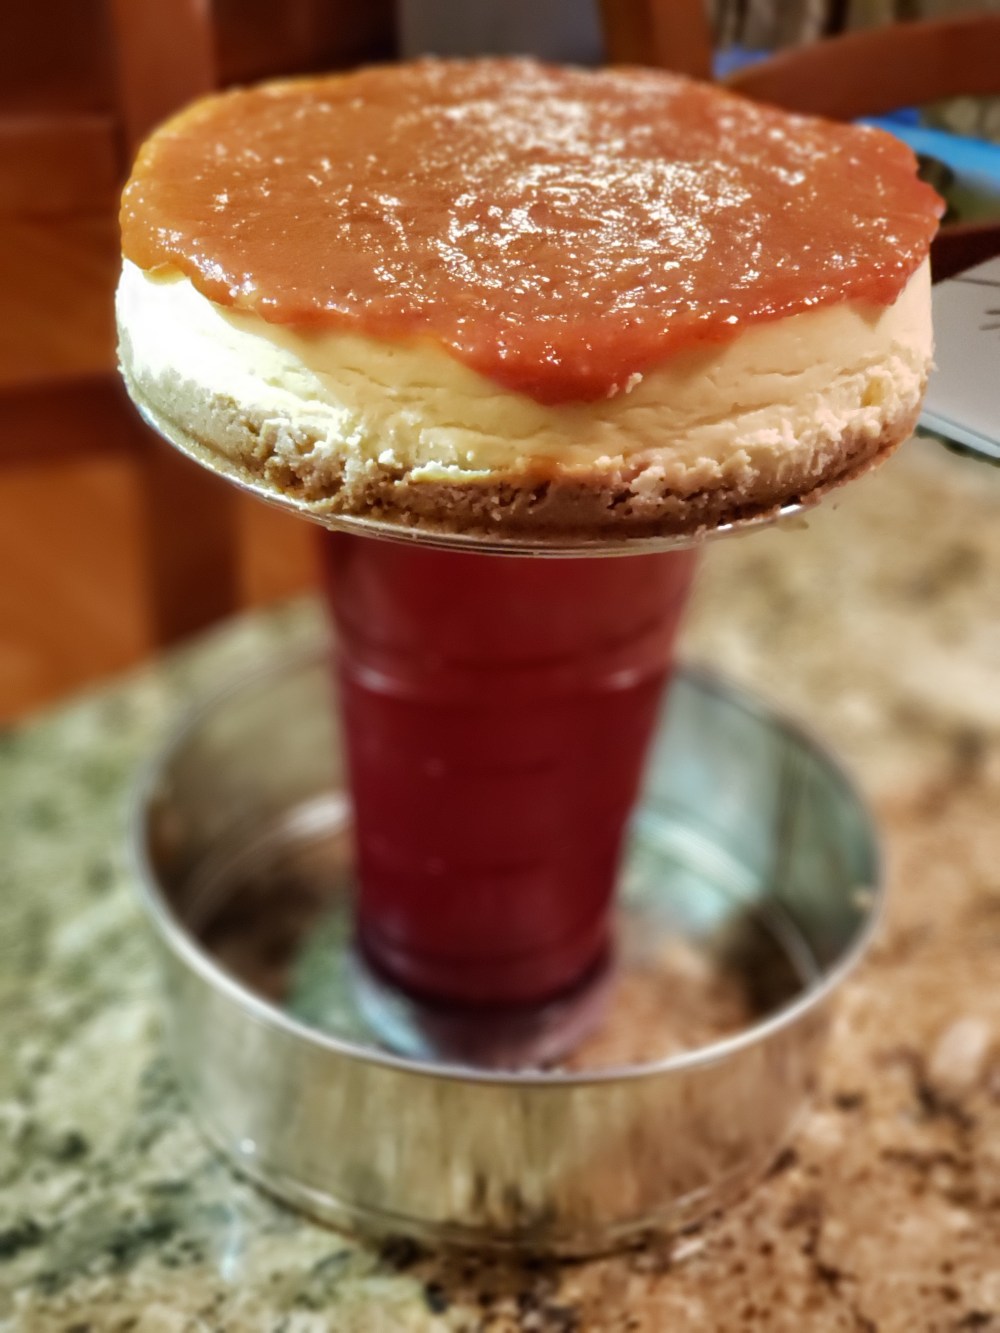
-Enjoy!!!!